As part of the Future
of SharePoint event Microsoft announced Flow
and Power Apps integration with SharePoint.
Though the ability to create PowerApps and Flows directly within
SharePoint lists will be available only on the upcoming releases we could still
create PowerApps and Flows that connect to SharePoint Online lists through the
PowerApp and Flow designers. In this blog we will see an example of a simple expense approval
app that uses SharePoint Online lists, PowerApps and Flow
Setting up the Expense Entry
List
Create a custom list in SharePoint online site with the below
columns
1. Expense Title
2. Expense Date
3. Expense Amount
4. Status
Developing Expense Entry
PowerApp
3. Open PowerApps studio and sign in with your account.
4. From the left navigation click New and under the Create an app
from your data section select SharePoint Online – Phone layout.
5. Click Add button in Connections section and from the list of
connection types that shows up select SharePoint Online and click Connect
button.
6. In the Connect to a SharePoint Site input section enter the URL of
the SharePoint Online site containing the Expense list and click Go.
7. When prompted for login enter the credentials for SharePoint
Online site.
8. This will bring up the lists available in the site, from which
select Expense Entry list which was created earlier and click Connect.
9. You will be prompted to save the PowerApp, do so by giving a valid
name for the app.
10. The app would be created with three screens
a. Browse screen – Lists all the expense entries
b. Detail screen - Shows
details of a particular expense entry
c. Edit Screen – Form for editing\creating expense entry
11. Save the app and close PowerApps studio.
Developing Expense Approval Flow
2. Click on My flows from the top navigation and click Create new
flow button
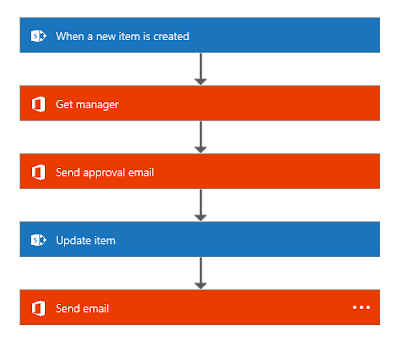
3. Within the flow designer in the “How would like to start” input
select “SharePoint Online – When a new
item is created” option.
4. In the configuration form that shows up enter the URL of the
SharePoint site where the expense list resides and in the List name input
select the expense list.
5. Click + button at the bottom to add next step to the flow and
click Add an action button.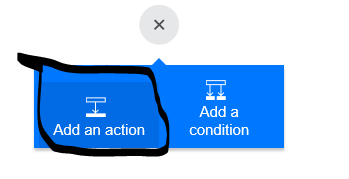
6. In the “What would like to do next” input select “Office 365 Users Get manager” option.
7. For User field input in Get manager step select “Created by Email”
from outputs from the previous step.
8. Click + button at the bottom to add next step to the flow and
click Add an action button.
9. In the “What would like to do next” input select “Send approval mail” option.
10. Sign in to Office 365 using your credentials.
11. For Subject field input in Send approval mail step enter “Expense
Approval Request” and select “Created by Display Name” from outputs from the
when new item is created step.
12. For To field input in Send approval mail step select “Email” from
outputs from the Get manager step.
13. For Body field input in Send approval mail step select “Title” and
“Expense Amount” fields from outputs from the when new item is created step.
14. Click + button at the bottom to add next step to the flow and
click Add an action button.
15. In the “What would like to do next” input select “SharePoint Online – Update Item” option.
16. In the configuration form that shows up enter the URL of the
SharePoint site where the expense list resides and in the List name input
select the expense list.
17. For Id field input in SharePoint Online – Update Item step select
“ID” from outputs from the when new item is created step.
18. For Status field input in SharePoint Online – Update Item step
select “SelectedOption” from outputs from send approval mail step.
19. Click + button at the bottom to add next step to the flow and
click Add an action button.
20. In the “What would like to do next” input select “Send email” option.
21. Sign in to Office 365 using your credentials.
22. For To field input in Send email step select “Created by email”
from outputs from the update items step.
23. For the Subject and Body field input in Send email step enter
“Your expense has been “and select “SelectedOption” from the outputs from Send
approval mail step.
24. Give a name for the flow and click Save button to save the flow.
25. The final flow would like the one shown in image below
Power App and Flow in action
1. Logon to web.powerapps.com and from My Apps list click on the
Expense App created.
2. Click on + link from top right of the Browse screen. This will
take you to the Edit screen.
3. Fill in the expense request details and save the record by
clicking tick mark at top right.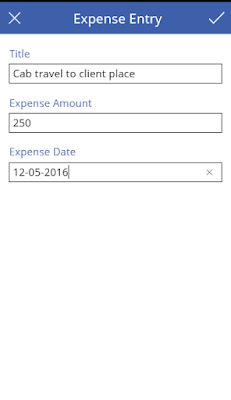
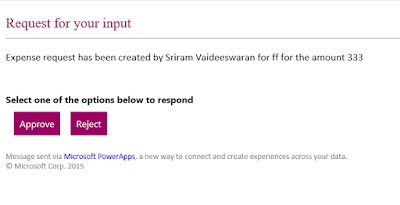
4. An approval request will be sent to the users manager.
5. Once the manager approves or rejects the request an email
notification will be sent to the expense request creator and the status will be
updated in SharePoint expense list.